
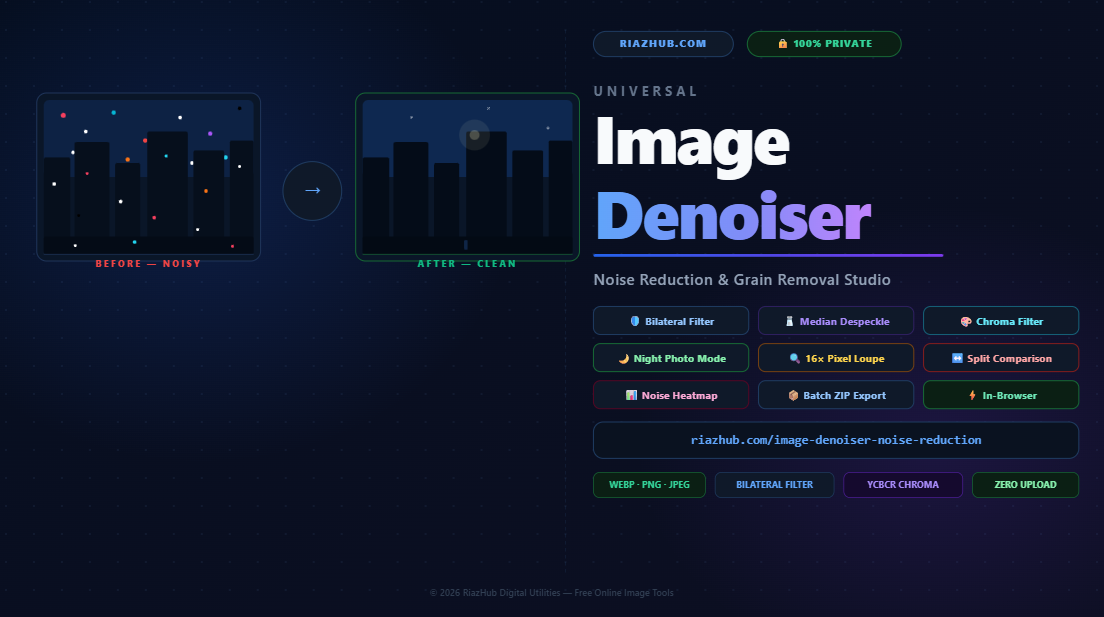
The good news is that modern computational image processing can remove the vast majority of this noise while keeping the sharp edges, fine textures, and high-contrast silhouettes that give a photo its visual power. By using RiazHub’s free Universal Image Denoiser & Noise Reduction Studio, you can apply professional-grade bilateral filtering, median despeckle, YCbCr chroma noise suppression, and unsharp detail recovery directly inside your browser with zero uploads and absolute privacy guaranteed.
In this comprehensive guide, we will explore exactly what image noise is, where it comes from at a hardware level, how each denoising algorithm mathematically works, when to apply each filter type, and how to use the interactive denoising studio for maximum sharpness and minimum artifact introduction.
🎯 Try the Denoiser Right Now No Upload Required
Drag any noisy photo into RiazHub’s free browser-based denoiser and see clean, grain-free results instantly completely private, zero server uploads.
1. What Is Image Noise? The Physics of Sensor Grain
Image noise is random, unwanted variation in pixel brightness or color values that degrades the visual quality of a photograph. Unlike film grain which has an organic, pleasing aesthetic quality digital sensor noise appears as harsh, unstructured speckling that destroys fine detail, muddles smooth gradients, and produces a “dirty” appearance in shadows and flat-color regions.
At a fundamental hardware level, digital noise originates from several distinct physical phenomena inside the camera’s image sensor:
- Shot Noise (Photon Noise): Caused by the inherently statistical nature of photon arrival. Even under perfectly constant light, the number of photons striking any given sensor well follows a Poisson distribution, meaning identical scene brightness produces slightly different electron counts every time.
- Read Noise / Thermal Noise: Electronic circuits generate random voltage fluctuations simply by operating at non-zero temperatures. At high ISO settings, the signal amplification circuit amplifies this thermal noise alongside the legitimate image signal, making grain dramatically more visible.
- Fixed Pattern Noise (Hot Pixels): Some sensor photodiodes permanently produce incorrect bright or dark values regardless of exposure these “dead pixels” or “hot pixels” create the characteristic salt-and-pepper speckle pattern visible on long exposures and high-gain shots.
- Chroma / Color Noise: Because photon-to-electron conversion is slightly non-uniform across RGB color filter channels, random colored blotches (typically red, green, or blue) appear in shadow regions and smooth sky gradients where the color should be uniform.
- Compression Artifacts: JPEG encoding discards high-frequency spatial information through quantization, introducing blocky 8×8 ringing artifacts that resemble structured noise around high-contrast edges.
The RiazHub Image Denoiser is engineered to address all five categories of digital noise through a multi-stage algorithmic pipeline, which we will unpack in detail in the following sections.
2. Understanding ISO and Why High-ISO Photography Produces the Most Noise
ISO sensitivity is a measure of how strongly a camera’s sensor amplifies the incoming light signal before converting it to a digital value. At the base ISO (typically ISO 100 on a modern DSLR or mirrorless camera), the amplification gain is minimal, and noise is almost invisible. As you increase the ISO to 800, 3200, or 12800 to shoot in darker environments without a slow shutter speed, the gain circuit multiplies the signal — and any background electronic noise by proportionally larger factors.
Consider the analogy of a radio receiver: tuning the volume knob to maximum will make a faint signal audible, but it will also make the background static roar. High-ISO photography works identically. This is why night photography, astrophotography, indoor sports, concert photos, and security camera footage are particularly vulnerable to severe digital grain.
Each doubling of ISO value (e.g., ISO 400 → ISO 800) roughly doubles the visible noise amplitude in the resulting image. A photo taken at ISO 6400 will have approximately 6.5× more measurable grain variance than the same camera at base ISO 100.
The Night Photo (High-ISO) preset in the Universal Image Denoiser is specifically calibrated with higher bilateral filter strength, a wider spatial radius, and aggressive 80% chrominance smoothing to handle the thermal grain signatures typical of ISO 3200–51200 captures on modern crop sensor and full-frame cameras.
3. The Five-Stage Denoising Pipeline Explained
RiazHub’s denoiser does not apply a single blunt filter to your image. Instead, it runs a five-stage cascade where each algorithm addresses a specific noise category:
🛡️ Bilateral Edge-Preserving Filter
Smooths flat textures and uniform gradients by combining spatial proximity and photometric color-similarity Gaussian kernels. High-contrast edges receive near-zero smoothing weight, preserving sharp silhouettes.
🧂 Median Filter Despeckle
Rank-sorts 9 neighbors in a 3×3 window and replaces each pixel with the statistical median value. Isolated hot pixels and salt-and-pepper speckles cannot represent the median and are cleanly removed.
🎨 YCbCr Chrominance Suppressor
Separates the RGB frame into a perceptual YCbCr color space, then applies targeted box-averaging to the Cb and Cr chroma channels to eliminate colored blotches while leaving luminance (Y) details intact.
🌙 High-ISO Night Mode
Chains bilateral filtering with dedicated chroma suppression at parameters tuned specifically for the heavy thermal grain patterns generated by high-gain sensor amplification in low-light photography.
✨ Unsharp Mask Detail Recovery
Applies an unsharp mask (original − blurred × amount) after denoising to restore fine micro-contrast, recover texture edges, and prevent the plasticky over-smoothed appearance common in aggressive noise reduction.
You can control every stage individually through the parameter sliders in the Noise Control Studio panel, or apply one-click Quick Preset Profiles that bundle optimized parameter sets for specific photographic scenarios.
4. How Bilateral Filtering Works: The Mathematics of Edge-Safe Denoising
Standard Gaussian blur is the simplest way to reduce noise it averages each pixel with its spatial neighbors, weighted by their distance. The problem is that Gaussian blur is “blind” to edges: it will blur fine hair, eyelashes, text, foliage, and every other high-frequency detail as aggressively as it blurs smooth sky noise, because it only looks at spatial distance, not color similarity.
Bilateral filtering was introduced precisely to solve this problem. It extends the standard Gaussian formula by adding a second weight term that penalizes pixels whose color is significantly different from the center pixel:
| Filter Component | Mathematical Formula | What It Controls |
|---|---|---|
| Spatial Gaussian Weight | exp(−d² / 2σ_s²) |
How fast the influence of distant neighbors decreases (σ_s = Spatial Radius slider) |
| Range (Photometric) Gaussian Weight | exp(−ΔI² / 2σ_r²) |
How much color difference reduces a neighbor’s weight (σ_r = Edge Threshold slider) |
| Combined Bilateral Weight | W = Spatial × Range |
Final normalized weight near-zero at edges, high inside flat regions |
When two neighboring pixels sit on opposite sides of a sharp edge (e.g., a dark building silhouette against a bright sky), their color intensity difference ΔI is large. The range Gaussian term exp(−ΔI² / 2σ_r²) drops toward zero, effectively removing that edge-crossing neighbor from the average. This allows flat, noisy regions to be smoothed aggressively while every sharp edge in the scene remains perfectly intact.
Set a low Edge Preservation Threshold (σ_r ≈ 10–20) to preserve even very subtle edges and fine textures at the cost of slightly less noise smoothing. Set a high threshold (σ_r ≈ 50–80) to aggressively smooth wider color gradients, ideal for eliminating sky banding and large grain patches in night photos where individual grain edges are not meaningful.
You can instantly see how bilateral filtering works on your specific photo by opening the Noise Reduction Studio and switching to the “16× Artifact & Grain Loupe” tab it renders a magnified before/after comparison at 16× pixel zoom for inspecting individual grain removal against edge retention in real time.
5. Median Filter Despeckle: Eliminating Salt-and-Pepper Noise
Bilateral filtering is excellent against Gaussian grain, but it struggles with impulsive noise isolated pixels whose values are wildly inconsistent with every surrounding neighbor. These are the “salt” (bright white speckles) and “pepper” (pure black dots) pixels produced by dead sensor photodiodes, cosmic ray strikes, electrical interference, and scanning artifacts from aged printed media.
The median filter takes a fundamentally different approach:
- For each pixel, gather all 9 pixel values from a 3×3 neighborhood window.
- Sort those 9 values from smallest to largest.
- Replace the center pixel with the 5th value (the statistical median) of the sorted array.
The key insight is that a single isolated hot pixel even if it reads pure white (255) cannot represent the median of 9 values where the other 8 surrounding neighbors are all realistic mid-tone values. The outlier is automatically discarded without any blurring of the underlying texture, because the median operation fundamentally ignores statistical outliers.
Scanned printed photographs with scanner head noise, astrophotography with cosmic ray hot pixel artifacts, damaged old film scans with scratches and dust, and any image with visible isolated white/black speckles that stand out against surrounding surfaces.
Select the “🧂 Median Despeckle” algorithm in the Denoise Algorithm panel, or load the “Old Scan Despeckle” quick preset for pre-tuned settings optimized for scanned prints and archival photography.
6. YCbCr Chrominance Noise Suppression: Eliminating Colored Blotches
Perhaps the most visually disturbing type of camera noise is chroma noise the random red, green, and blue blotches that appear in shadow areas and smooth monochromatic surfaces. On a blue sky, chroma noise looks like scattered teal and magenta pixels. On a portrait’s shadowed cheek, it produces unnatural green and purple speckling that makes skin look diseased.
The fundamental problem with trying to fix chroma noise using standard RGB-space filtering is that you cannot separate “unwanted color randomness” from “intentional color variation” in the RGB domain. Both look identical: variation in R, G, and B values.
The solution is to convert the image from RGB to the YCbCr perceptual color space before filtering:
| YCbCr Channel | What It Represents | Denoising Strategy |
|---|---|---|
| Y (Luma) | Perceived brightness and fine structural detail (edges, textures, sharpness) | 🟢 Left completely untouched preserves all sharpness |
| Cb (Blue Chrominance) | Blue-to-yellow color deviation from neutral gray | 🔵 Aggressively smoothed by 5×5 box average |
| Cr (Red Chrominance) | Red-to-cyan color deviation from neutral gray | 🔴 Aggressively smoothed by 5×5 box average |
After smoothing Cb and Cr, the tool converts everything back to RGB. The result is an image that loses almost no perceived sharpness or structural detail, because the Y channel was never modified, while all colored blotches and chroma speckling are eliminated. Human vision is approximately four times more sensitive to luminance changes than chrominance changes, which is why this strategy is so effective: viewers barely notice blurring in the chroma domain.
Experiment with the Chrominance (Color) Smoothing slider in the Noise Reduction Studio to dial in exactly how aggressively colored blotches are removed. A value of 30–50% eliminates most visible chroma noise; 70–90% is appropriate for heavy night photography or underwater images where the sensor’s Bayer filter pattern breaks down significantly.
7. Comparing the Four Denoising Modes: Which Algorithm for Which Photo?
Choosing the right algorithm for your specific type of noise is as important as the filter parameters themselves. Here is a practical decision guide:
| Noise Type | Common Sources | Best Algorithm | Recommended Preset |
|---|---|---|---|
| High-ISO luminance grain (gray speckle) | Indoor shots, concert photography, low-light handheld | 🛡️ Bilateral Edge-Safe | Night Photography (High-ISO) |
| Salt-and-pepper hot pixels | Long exposure astrophotography, old scans, damaged film | 🧂 Median Despeckle | Old Scan Despeckle |
| Colored chroma blotches (red/green speckles) | Shadow areas, ISO 1600+, smartphone night mode failures | 🎨 Color Noise Only | Night Photography (High-ISO) |
| Mixed grain + chroma + JPEG artifacts | Social media downloads, compressed screenshots, WhatsApp | 🌙 Night Photo (High-ISO) | Heavy Artifact Purge |
| Portrait skin texture smoothing | Beauty photography, fashion, close-up portraits | 🛡️ Bilateral (low σ_r) | Portrait Skin Smooth |
🖼️ Inspect Noise Removal with the 16× Pixel Loupe
Switch to the Loupe tab inside the denoiser to zoom into a 16× magnified view of your photo’s grain comparing original noise patterns against the clean denoised surface at pixel-level precision.
8. The Interactive Split-Screen Before/After Comparison
One of the most powerful features of the Noise Reduction Studio is its interactive split-screen comparison view. Once you have applied a denoising pass, switching to the “↔️ Split Slider” tab renders both the original noisy photo and the denoised result on the same canvas, separated by a draggable vertical divider.
Drag the handle left to reveal more of the original grain; drag it right to see the clean denoised result. This allows you to evaluate precisely how much noise was removed in specific regions shadow corners, skin midtones, bright sky gradients, textured surfaces while immediately seeing whether any fine detail was unintentionally softened by the filter.
The “📊 Noise Heatmap” tab provides a complementary analytical view: it renders a false-color thermal visualization of the exact pixel-level differences between the original and denoised outputs. Isolated noise pixels that were filtered out appear as bright magenta-to-yellow hot spots, while smooth areas where little filtering occurred remain dark. This makes it immediately clear which regions of the photo contained the most severe noise concentration.
9. The Intelligent Auto-Denoise Feature
For users who want optimal results without manually tuning five parameter sliders, the “✨ Intelligent Auto-Denoise” button analyzes a sample patch from your loaded photo to automatically estimate the appropriate filter settings:
- Samples a 128×128 pixel patch from the loaded image.
- Converts the patch to YCbCr and computes local luminance variance the statistical measure of pixel brightness spread that directly correlates with noise amplitude.
- Measures average chrominance deviation from neutral gray to detect the presence and severity of color noise.
- Maps the measured variance to optimal Denoise Strength, Spatial Radius, and Edge Threshold parameters tuned for three noise severity tiers: Low (variance < 150), Medium (variance 150–450), and High (variance > 450).
- Automatically increases Chrominance Smoothing to 70% if significant chroma deviation is detected in the sample.
The automatic detection samples a fixed 128×128 corner patch, which may not represent the full noise distribution if your image has non-uniform noise (e.g., clean foreground with a very noisy dark background). For best results, use Auto-Denoise as a starting point and then fine-tune individual sliders manually for the specific regions you care about most.
10. Detail Recovery: Preventing the “Plastic Skin” Effect
One of the most common criticisms of noise reduction filters is that aggressive denoising destroys the fine textural details that make a photograph feel real and dimensional. Over-processed portraits look like they were painted in smooth plastic. Landscapes lose their natural grain and texture. Architecture loses its material surface quality.
The fifth stage of the denoising pipeline Unsharp Mask Detail Recovery addresses this directly. After the noise reduction passes have smoothed the image, the unsharp mask re-introduces micro-contrast by subtracting a slightly blurred version of the denoised result from itself:
Sharpened = Denoised + Amount × (Denoised − BlurOf(Denoised))
This operation boosts local contrast at genuine edges (skin pore edges, hair strands, fabric weave, foliage edges) without re-amplifying the removed noise because the noise has already been eliminated by prior filter stages. The Detail Recovery & Sharpness slider in the Noise Control Studio controls the unsharp mask amount from 0% (pure smooth denoise output) to 100% (aggressive micro-contrast boost for maximum perceived sharpness).
A setting of 15–25% is ideal for most portrait and landscape photography. Push to 40–60% for technical photography, product photography, or text-heavy document restoration where sharp edges are critical.
11. Batch Processing Multiple Photos at Once
Professional photographers and editors often need to apply consistent noise reduction settings across dozens or hundreds of photos from the same shooting session all captured at the same ISO, same lighting conditions, and therefore sharing nearly identical noise characteristics.
The Batch Matrix in the Image Denoiser Studio supports loading multiple images simultaneously via drag-and-drop or multi-file selection. Each photo appears as a card in the batch grid with its thumbnail, dimensions, filename, and current processing status. You can:
- Apply the same denoising parameters to all queued photos with a single click.
- Select any individual photo for targeted preview, parameter adjustment, and isolated export.
- Download each denoised photo individually in your chosen format (WebP, PNG, JPEG) with a custom filename suffix.
- Package the entire denoised batch into a valid PKZIP archive with one-click “📦 Download Batch as ZIP” using the built-in in-memory ZIP builder no server involvement, no file size limits, no waiting for cloud processing.
📦 Process Your Entire Photo Session in One Batch
Load dozens of noisy high-ISO photos from the same shooting session, apply consistent denoising parameters, and download the entire clean batch as a compressed ZIP archive all processed privately in your browser.
12. Export Options: WebP, PNG, and JPEG Lossless Output
After denoising, the tool exports full-resolution images at the exact original pixel dimensions not the downscaled preview size displayed on screen. You can choose from four export format options:
| Export Format | Best For | Quality Control |
|---|---|---|
| Preserve Original | Maintaining the source container format exactly (JPEG in, JPEG out) | Uses source format’s compression |
| WebP (Modern Compact) | Web publishing, social media upload, efficient storage — 25–35% smaller than JPEG | Quality slider: 10%–100% |
| PNG (Lossless Crystal) | Archives, editing master files, screenshots, images with transparency | Always lossless — no quality slider needed |
| JPEG (Photo Quality) | Camera-compatible output, printing, email attachments with broad support | Quality slider: 10%–100% (92% default) |
The default export setting of WebP at 92% quality provides an excellent balance of visual fidelity, near-lossless visual quality, and significantly reduced file size compared to the JPEG source. For archival or editing-chain purposes, always prefer PNG lossless to ensure that subsequent edits do not compound JPEG quantization artifacts on top of the already-processed denoised image.
13. Privacy Architecture: Why Zero Uploads Matters for Sensitive Photography
Many categories of photographs are deeply personal or legally sensitive: medical imaging, passport and ID photographs, private family captures, legal evidence exhibits, proprietary product prototypes, and confidential business documents. Uploading these images to a cloud-based noise reduction service creates real and serious privacy risks files may be cached on CDN edges, retained in server logs, analyzed for machine learning training datasets, or accessed by unauthorized parties.
RiazHub’s Image Denoiser executes every pixel computation inside your browser’s JavaScript sandbox using native HTML5 Canvas getImageData() typed array buffers. The convolution kernels, bilateral weight calculations, YCbCr transformations, and ZIP packaging all occur in local device memory. Your network traffic monitor will show zero outbound image data during denoising because none is transmitted.
Every denoising operation including bilateral filtering, median despeckle, YCbCr chroma separation, unsharp mask sharpening, loupe magnification, heatmap generation, and ZIP batch packaging occurs exclusively in your browser’s local memory. No photo data, pixel values, filenames, or metadata are transmitted to RiazHub’s servers or any third-party service.
14. Step-by-Step Usage Guide: Getting Perfect Results in Under 60 Seconds
The following workflow walks you through the complete denoising process for a typical high-ISO night photograph:
- Open the Studio: Navigate to the Universal Image Denoiser & Noise Reduction Studio on RiazHub.
- Load Your Photo: Drag and drop a noisy image directly onto the dropzone, click “📁 Select Photo(s)”, or press Ctrl+V to paste directly from your clipboard. JPEG, PNG, WebP, AVIF, BMP, and GIF are all accepted.
- Try Auto-Denoise First: Click “✨ Intelligent Auto-Denoise” to let the tool automatically analyze your photo’s noise level and set optimal parameters. The live canvas will update instantly.
- Select the Right Algorithm: If you see colored blotches, switch to “🎨 Color Noise Only”. For a scanned print with dust speckles, choose “🧂 Median Despeckle”. For high-ISO grain, “🛡️ Bilateral” or “🌙 Night Photo” are ideal.
- Inspect with the Loupe: Switch to the “🔍 16× Loupe” tab and move your mouse over different regions of the image to inspect noise removal at pixel level. Pay attention to edge areas (hair, fabric, text) to verify that sharpness was preserved.
- Compare with the Split Slider: Switch to “↔️ Split Slider” and drag the divider to compare the original and denoised result across the full image frame.
- Adjust Detail Recovery: If the result looks too smooth or “plastic,” increase the Detail Recovery & Sharpness slider to 20–35% to restore micro-contrast.
- Export: Click “Download Denoised Image” for a single photo, or “📦 Download Batch (ZIP)” for your entire queue.
15. Frequently Asked Questions (FAQ)
Does denoising reduce my photo’s effective resolution or megapixel count?
No. The exported denoised image is always the same pixel dimensions as the source input. The number of megapixels is identical. What denoising changes is the spatial frequency content — random high-frequency noise variance is suppressed, while structured high-frequency edges are preserved by the bilateral filter’s range weighting. Use the Detail Recovery slider to restore as much fine texture as your eye demands. You can verify pixel dimensions in the resolution indicator shown beside the tab switcher inside the Noise Reduction Studio.
Can I use this tool on screenshots and social media photos?
Absolutely. Screenshots compressed by messaging apps (WhatsApp, Telegram, Messenger, Instagram) and social media platforms often contain severe JPEG compression artifacts that look similar to random noise. The “Heavy Artifact Purge” preset in the Image Denoiser applies aggressive bilateral smoothing followed by chrominance suppression and enhanced detail recovery ideal for cleaning up compressed social media downloads before printing or republishing.
Will the denoiser work on RAW camera files?
RAW files (CR2, NEF, ARW, DNG) use proprietary binary encoding that HTML5 Canvas cannot decode natively. The tool accepts standard raster image containers: JPEG, PNG, WebP, AVIF, BMP, and GIF. To denoise RAW files, first export them to TIFF or high-quality JPEG from your RAW developer (Lightroom, Darktable, Capture One), then process through the Noise Reduction Studio.
How large a photo can the denoiser handle?
The tool automatically scales the interactive live preview down to a maximum of 1200px on the longest dimension for responsive real-time feedback during slider adjustments. However, when you click the Download Denoised Image button, the tool re-processes the complete original full-resolution image at full native dimensions a 50-megapixel camera capture exports at full 50MP. Processing time scales with pixel count; a 24MP JPEG typically completes in 3–12 seconds depending on your device’s processor speed and the chosen filter radius.
Is the denoiser better than Photoshop’s noise reduction?
Adobe Photoshop’s Camera Raw Filter and Lightroom’s Denoise AI use deep neural network inference (requiring GPU acceleration and an internet connection for cloud AI processing in some versions). RiazHub’s browser denoiser uses classical mathematical algorithms (bilateral filtering, median filtering, YCbCr chroma separation) that operate entirely locally with no software installation, no subscription, and zero upload requirement. For most use cases — especially social media photos, high-ISO grain, and scanned print despeckle the classical bilateral + chroma pipeline produces excellent results that rival commercial software at zero cost and maximum privacy.
Conclusion
Digital image noise is an unavoidable physical consequence of electronic photography but it is not a permanent feature of your photographs. With the right algorithmic tools applied in the right sequence, even severely grainy low-light captures and salt-and-pepper-speckled scans can be restored to smooth, sharp, printable quality.
By combining edge-preserving bilateral filtering, median rank despeckle, YCbCr chrominance separation, and unsharp mask detail recovery, the Universal Image Denoiser & Noise Reduction Studio on RiazHub gives you professional-grade noise reduction in a completely free, private, zero-installation, browser-based tool. Load any photo, inspect the results at 16× magnification through the forensic loupe, compare before and after through the interactive split-screen, and download your cleaned images in lossless WebP or PNG format all without sending a single pixel to an external server.
🚀 Remove Noise from Your Photos Right Now
Upload any noisy image — high-ISO night shot, scanned print, compressed screenshot — and download a clean, sharp, grain-free result in under 60 seconds. Free forever. Zero uploads. Zero account required.
Universal Image Denoiser & Noise Reduction Studio
Remove high-ISO camera grain, eliminate salt-and-pepper sensor speckles, and smooth color blotches while preserving sharp silhouettes with live interactive split-screen comparison and 16x artifact loupe.
🛡️ Edge-Preserving Bilateral Filtering
Standard Gaussian blur blurs boundaries because it only factors spatial distance. Bilateral filtering multiplies a spatial Gaussian kernel by a range kernel measuring photometric (color) similarity:
When adjacent pixels cross an edge with high contrast, the color distance penalty drops the weight to near zero, preserving sharp silhouettes while aggressively smoothing flat textures.
🎨 YCbCr Chrominance Noise Separation
Digital sensors produce ugly colored red/green/blue thermal blotches in low-light shadows. Converting RGB to YCbCr isolates the luminance channel ($Y$) from chromatic color channels ($Cb$, $Cr$):
By filtering $Cb$ and $Cr$ aggressively while keeping $Y$ intact, heavy color mottling is eliminated without blurring fine hair or edge textures.
🧂 Median Filter Despeckle for Scans & Hot Pixels
Salt-and-pepper noise (white and black spikes) and dead sensor pixels wreak havoc on linear filters. The non-linear median filter sorts neighborhood values:
Because an isolated bright outlier cannot represent the statistical median of a 9-pixel matrix, it is cleanly replaced by the surrounding texture without blurring lines.
🔒 100% Client-Side Privacy Guarantee
All pixel transformations, matrix sampling, convolutions, and image exports occur directly inside your browser using HTML5 Canvas and typed array buffers.
Sensitive personal captures, medical scans, IDs, and night photos never leave your device memory or hit external cloud servers.