
The Complete Guide to Adjusting Image Brightness, Exposure & Luminance Curves Without Washing Out Colors
When most users attempt to correct this issue using standard photo viewers or generic smartphone apps, the immediate impulse is to push the single “Brightness” slider to +50% or +80%. The result is almost universally disappointing: instead of looking vibrant and natural, the deep black shadows turn into an unnatural hazy gray, the highlights blow out to pure blinding white (#FFFFFF), and natural color saturation evaporates into a washed-out mess.
Why does this happen? The answer lies in the fundamental difference between crude linear mathematical shifts and authentic photographic luminance physics. To fix dark pictures with studio-grade clarity, you need logarithmic exposure multipliers, non-linear gamma curves, and per-pixel photometric luminance calculations.
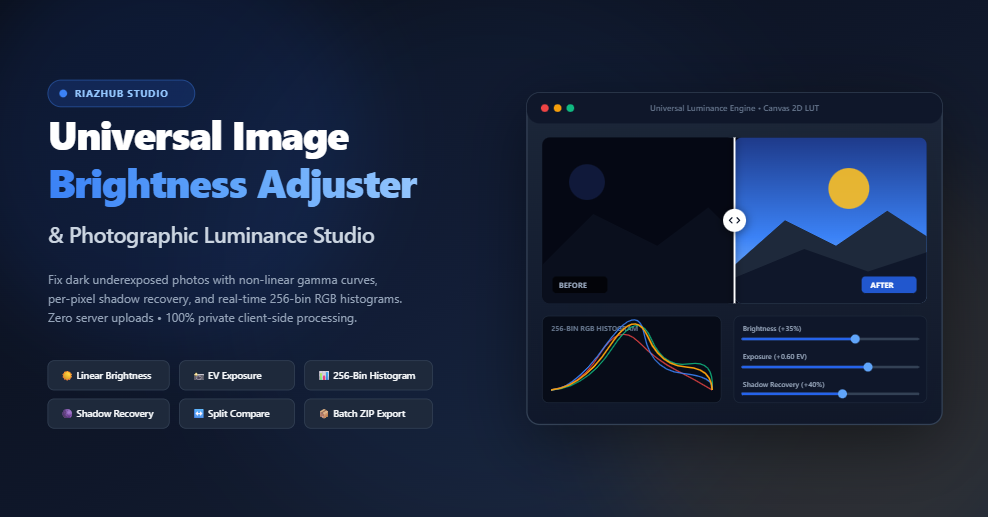
In this guide, we break down the exact mathematics of image illumination, show you how to read live 256-bin RGB histograms, and demonstrate how you can achieve studio-grade results in seconds using the free, in-browser Universal Image Brightness Adjuster & Luminance Studio at RiazHub.com.
Need to Brighten a Dark Photo Right Now?
Skip the complex desktop software. Process high-resolution JPGs, PNGs, and WEBP photos instantly in your browser with zero server uploads and complete privacy.
1. Linear Brightness vs. Photographic Exposure: Why Simple Sliders Ruin Photos
Most rudimentary image editing software implements brightness as a straightforward linear arithmetic addition:
If a pixel has an RGB value of (10, 10, 10) representing a deep shadow, adding a linear offset of +60 turns that pixel into (70, 70, 70). Instead of remaining a rich, foundational black anchor, it turns into a pale, milky slate gray. Simultaneously, bright cloud details with an original value of (210, 210, 210) are pushed beyond 255 and clamped, permanently erasing the sky’s delicate texture.
Professional photographic tools, including the Image Brightness Adjuster on RiazHub, solve this problem by providing dual-axis control:
- Photographic Exposure Multiplier (EV Stops): Rather than adding a fixed constant, photographic exposure acts as a logarithmic multiplier:
Multiplier = 2^(EV_Value) | e.g., +1.0 EV doubles photon values (×2.0)
This mimics opening the physical camera aperture or prolonging shutter speed, scaling highlight and midtone illumination naturally.
- Non-Linear Midtone Gamma Tuning: Human eyes do not perceive brightness linearly; our visual receptors are far more sensitive to subtle differences in dark tones than in bright ones. A gamma power curve expands midtone visibility while anchoring the absolute darkest shadows (0) and brightest whites (255):
Output = 255 × (Input / 255)^(1 / Gamma)
2. Human Eye Perception & ITU-R BT.709 Selective Tone Mapping
Did you know that human vision is significantly more sensitive to green light wavelengths than to red or blue? If an image editing algorithm adjusts all three color channels uniformly, colors appear artificial and neon.
To maintain photorealistic fidelity, the RiazHub Luminance Studio uses the international ITU-R BT.709 photometric standard to calculate the perceived luminance ($Y$) of each individual pixel:
With perceived luminance calculated on a per-pixel basis, advanced selective recovery becomes possible:
- Selective Shadow Recovery: Automatically identifies pixels where $Y < 128$ and applies an inverse weighting curve. Only the underexposed shadow areas are lifted, revealing hidden textures in dark clothing, trees, and dim rooms without touching already bright skies.
- Selective Highlight Recovery: Targets pixels where $Y > 128$ and pulls down harsh specular reflections, preserving cloud contours, light fixtures, and sunny horizons.
3. How to Read a 256-Bin RGB & Luma Histogram Like a Pro
A digital histogram is an x-ray of your image’s light distribution. It plots the count of pixels across 256 tonal steps—ranging from 0 (absolute black) on the far left to 255 (absolute white) on the far right.
The Three Key Zones of a Histogram:
- Shadows (Bins 0–63): If the curves are stacked heavily against the left vertical wall at bin 0, your image has “crushed shadows”—valuable image detail is lost to pure black. Increasing Exposure and Shadow Recovery spreads this curve into the readable range.
- Midtones (Bins 64–191): The healthy body of the histogram. A balanced, well-exposed photograph displays a gentle bell curve centered in this region.
- Highlights (Bins 192–255): If curves spike straight up against the far right wall at bin 255, your highlights are “clipped” or blown out. Pulling down the Highlight Recovery slider pulls these pixels back into a safe, printable tone boundary.
4. Feature Matrix: Why Client-Side Browser Processing Wins
Traditional online image editing tools force you to upload your personal photos to a remote third-party cloud server, wait for server-side processing queues, and download compressed results. Here is how modern in-browser canvas engineering changes the game:
| Feature Capability | Legacy Server-Side Cloud Converters | RiazHub Universal Luminance Studio |
|---|---|---|
| Privacy & Security | Photos sent to external servers & stored in temp folders | 100% In-Browser Local HTML5 Canvas (Zero server uploads) |
| Adjustment Speed | Laggy round-trip server uploads per edit | Instant 60 FPS Real-Time LUT Calculation |
| Tonal Controls | Single basic brightness slider | Brightness, Exposure EV, Contrast, Shadows, Highlights & Gamma |
| Histogram Diagnostics | Rarely provided or static snapshot | Live 256-Bin RGB + Luma Interactive Visualizer |
| Comparison View | Static before/after toggle | Interactive Split-Screen Swipe Divider |
| Batch Pipeline | Often paywalled or rate-limited | Unlimited Batch Processing with In-Memory ZIP Packager |
5. Step-by-Step: How to Brighten Your Dark Photos in Seconds
Ready to enhance your images? Follow this simple workflow using the Universal Image Brightness Adjuster:
- Load Your Image(s): Drag and drop any JPG, PNG, WEBP, AVIF, or BMP file directly into the upload area. You can also paste directly from your clipboard using Ctrl+V, or click “Dark Sample” to test the tool instantly.
- Try 1-Click Auto-Balance: Click the “✨ Auto-Balance Levels” button. The tool automatically analyzes the average pixel luminance and intelligently compensates exposure, midtone gamma, and shadow boost.
- Fine-Tune Master Sliders:
- If the whole scene is dim: Raise Exposure (+0.30 to +0.80 EV).
- If subjects are hidden in darkness: Boost Shadow Recovery (+30% to +60%).
- If the photo looks flat: Increase Contrast (+10% to +20%).
- If sky or lights are blinding: Pull Highlight Recovery (-15% to -40%).
- Inspect with Split-Screen: Switch to the “↔️ Before / After Split” tab. Drag the interactive center divider left and right to inspect fine texture clarity between the original and adjusted image.
- Export in Modern WebP, Lossless PNG, or JPG: Choose your preferred output format, set your desired compression quality, and click “Download Brightened Image”. If processing a batch, click “Download All as ZIP Archive” to receive an instantly compiled archive.
6. Recommended Preset Profiles for Common Scenarios
The studio includes one-click optimized presets tailored for frequent photographic challenges:
- 🌙 Night Photo Fix: (+45% Brightness • +30% Shadow Recovery • 1.20γ Gamma). Designed for night cityscape photos, dim indoor parties, and evening smartphone snapshots.
- ☀️ Sunlit Glow: (+20% Brightness • +15% Contrast • -10% Highlight Cut). Ideal for backlit portraits where subjects are in shadows while the sun shines brightly behind them.
- 📄 Document Scanner: (+35% Brightness • +50% Contrast). Removes dark scanner cast and shadow gradients from phone photos of receipts, book pages, and ID cards, rendering crisp black text on white paper.
- 🎬 Moody Matte: (-15% Brightness • -25% Contrast • 0.90γ Gamma). Gives photographs an editorial cinematic film look with mellowed highlights and smooth low-contrast midtones.
7. Frequently Asked Questions (FAQ)
Will brightening an underexposed photo degrade its quality or add grain?
In digital photography, underexposed pixels contain fewer discrete signal levels. When you aggressively brighten extreme shadows, existing sensor noise (grain) naturally becomes more visible. The Universal Image Brightness Adjuster mitigates this by combining logarithmic exposure with selective S-curve contrast, preserving tone gradation rather than amplifying raw noise.
Are my private photos uploaded to RiazHub’s servers?
No. Absolutely zero photos or files are transmitted over the internet. The tool utilizes HTML5 Canvas 2DContext and ES6 lookup tables directly inside your browser’s local sandbox memory. Even when offline or without internet access, the tool functions at 100% capacity.
Can I process multiple images simultaneously?
Yes. You can drag and drop dozens of photos into the batch queue. Click “Apply Settings to Entire Queue” to apply your chosen luminance settings across all images, and download them all together in a single ZIP file created on-the-fly in memory.
What is the difference between WebP, PNG, and JPEG export?
WebP provides the modern sweet spot with up to 30% smaller file sizes at identical photographic fidelity. PNG is completely lossless (best for text documents and graphics), while JPEG provides maximum legacy compatibility with photo labs and older devices.
Ready to Transform Your Dark Photos?
Experience professional luminance grading without installing heavy software or compromising your privacy. Try the tool right now on RiazHub.com!O
Universal Image Brightness & Exposure Studio
Fix dark underexposed photos, balance contrast and shadows, analyze live 256-bin RGB histograms, and batch process high-resolution images in real time directly in your browser.
Luminance Physics, Photometric Gamma & Dynamic Range
Understand how browser-based digital tonal adjustment algorithms preserve image integrity and color fidelity.