
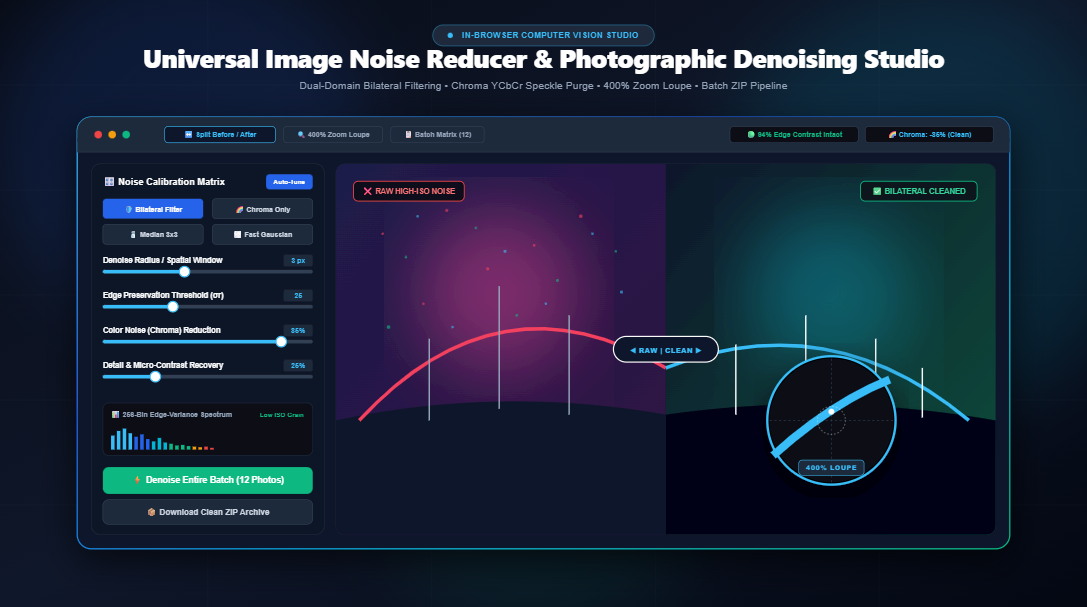
How to Eliminate High-ISO Grain and Color Noise Without Losing Detail: Edge-Preserving Bilateral Filtering & Photographic Denoising Guide
Every photographer, content creator, and archivist knows the heartbreak of capturing a stunning moment in dim lighting a twilight streetscape, a candlelit family gathering, or a dark concert venue only to inspect the resulting image and discover a chaotic storm of coarse sandpaper grain and mottled red, green, and purple chromatic speckles.
For decades, standard photo editors offered an inadequate solution: Gaussian blur. By blindly smoothing pixels across geometric proximity, conventional filters eliminate noise at the catastrophic expense of fine eyelashes, fabric weave, architectural lines, and optical contrast. The image ends up looking muddy, smeared, and hopelessly out of focus.
Fortunately, computer vision engineering provides a far superior paradigm: Edge-Preserving Bilateral Spatial Filtering paired with Dual-Channel YCbCr Color Separation and Post-Filter Unsharp Mask Recovery. In this comprehensive guide, we dissect the physics of digital camera sensor grain, contrast different denoising algorithms, and show you how to clean your photo collection using the free, in-browser Universal Image Noise Reducer & Photographic Denoising Studio on RiazHub.
1. The Physics of Digital Image Noise: Why Do Photos Get Grainy?
Digital camera sensors (whether in a $4,000 full-frame mirrorless camera or a smartphone) are matrices of tiny microscopic silicon wells called photodiodes. Each photodiode converts incoming photons of light into an electrical voltage. In bright sunlight, millions of photons flood each pixel well, creating a powerful, unambiguous electrical signal that dwarfs baseline sensor noise.
In low-light scenarios, photon counts plummet. To generate an adequately bright exposure without an impossibly long shutter speed, your camera amplifier dramatically boosts the electrical signal a process quantified as increasing the ISO sensitivity (ISO 1600, 6400, 12800+). However, amplifying an electrical signal also amplifies electronic noise. Visual noise in digital imagery originates from three primary physical phenomena:
- Photon Shot Noise: The fundamental quantum randomness of light particles arriving at the sensor surface. Shot noise follows a Poisson distribution and is mathematically unavoidable at low exposure levels.
- Thermal Noise (Johnson-Nyquist Noise): Caused by the random thermal agitation of electrons inside silicon sensor circuits. As sensors heat up during long exposures or continuous video recording, thermal noise spikes significantly.
- Sensor Read & Amplification Noise: Small fluctuations introduced by Analog-to-Digital Converters (ADCs) and electronic amplification circuits during signal readout.
2. Luminance Grain vs. Chrominance Noise: The Critical Distinction
A frequent error made by generic editing tools is treating all pixel variance identically. In photography, noise manifests across two fundamentally different visual channels:
Luminance Noise (Y Channel)
Luminance noise represents random variations in brightness or light intensity without changing the underlying color hue. It appears as fine or coarse monochromatic speckles, closely resembling traditional analog silver halide film grain (like Kodak Tri-X 400 or Ilford HP5). Many photographers find subtle luminance grain aesthetically pleasing or organic, as it gives images tactile texture and filmic depth.
Chrominance Noise (Cb & Cr Channels)
Chrominance (color) noise is entirely artificial and visually jarring. It presents as random blotches of magenta, green, blue, and cyan confetti scattered across smooth surfaces, skin tones, and dark skies. Chrominance noise destroys the perceived quality of a photo faster than any other sensor artifact.
By converting RGB pixels into the YCbCr color space, the Universal Image Noise Reducer isolates the luminance signal (Y) from the blue-difference (Cb) and red-difference (Cr) chrominance channels. This allows aggressive 80%–95% smoothing across color blotches while protecting the luminance channel to keep object structures tactile and sharp.
3. Algorithm Face-Off: Bilateral Filtering vs. Gaussian Blur vs. Median
Understanding which mathematical filter to apply to a specific image is the hallmark of professional photo restoration. Here is a breakdown of how the algorithms operate under the hood:
| Denoising Algorithm | How It Works Mathematically | Edge Retention | Best Suited For |
|---|---|---|---|
| Edge-Preserving Bilateral | Weights neighbor pixels by both geometric distance (σs) and radiometric color difference (σr). | 🟢 Exceptional (90%–98%) | Night cityscapes, portraits, skin textures, architecture, everyday low-light photos. |
| Chroma YCbCr Only | Averages Cb/Cr color channels while leaving luminance (Y) completely untouched. | 🟢 100% Geometric Sharpness | High-ISO mobile night shots with heavy colored confetti speckles. |
| 3×3 Median Filter | Sorts local neighborhood pixels numerically and picks the statistical median value. | 🟡 Moderate (Rounds sharp corners) | “Salt-and-pepper” noise, hot sensor dead pixels, scanner dust, scratched film scans. |
| Separable Gaussian Blur | Convolutional weighted average strictly based on spatial distance. | 🔴 Poor (Blurs edges into mush) | Soft backgrounds, gentle sky gradients, artistic dreamy softening. |
The Mathematics of the Bilateral Filter
Standard spatial Gaussian blur operates strictly based on geometric pixel distance. If a pixel is 2 pixels away, it receives a predefined weight regardless of whether it is part of the smooth sky or a dark telephone wire cutting through the frame.
The bilateral filter introduces an indispensable second component: radiometric intensity difference:
When calculating the new value of pixel (i, j), the filter checks neighboring pixel (k, l). If the neighbor has a radically different brightness or hue (representing an edge boundary), the range weight collapses toward zero. Consequently, noisy flat areas (skies, walls, smooth cheeks) are blended, while high-contrast boundaries (eyelashes, text, skyline horizons) are strictly protected.
4. Restoring Micro-Contrast with Post-Filter Unsharp Masking
Even with advanced bilateral mathematics, extensive smoothing can occasionally soften ultra-fine high-frequency textures such as hair follicles, tweed fabric, or tree bark. To counteract this, modern photographic studios employ an integrated Unsharp Mask (USM) difference pipeline:
- The clean bilateral filtered image is computed:
I_denoised. - A high-pass spatial gradient mask is extracted by subtracting the smoothed output from the raw input:
Detail_Mask = I_source - I_denoised. - A user-calibrated percentage (e.g., 20% to 35%) of this high-frequency texture is blended back into the clean output.
This technique restores crisp optical micro-contrast and punchy tactile realism without reviving underlying chromatic speckles.
5. Step-by-Step Workflow: How to Denoise Images on RiazHub
Cleaning up your noisy photographs takes only seconds using the browser-based studio on RiazHub:
- Import Your Grainy Photos: Drag and drop your JPG, PNG, WEBP, AVIF, BMP, or TIFF images into the dropzone. You can upload single high-res shots or an entire batch queue. If you have an image copied to your clipboard, press Ctrl + V to paste it instantly.
- Choose a Quick Preset or Calibrate Manually: Select from optimized 1-click profiles such as Night / High-ISO, Portrait Skin Smoothing, Vintage Film Grain, or Scanner Dust. Alternatively, click “Auto-Detect” to let our Sobel gradient variance engine analyze your image spectrum and recommend settings automatically.
- Fine-Tune Controls: Adjust the Denoise Radius (typically 2–4 px), set the Edge Preservation Range σr (18–30), increase Color Noise Reduction to purge confetti blotches, and dial in Detail Recovery (15%–30%) to restore crisp micro-contrast.
- Inspect with Loupe & Split Slider: Switch to the “Before/After Split” tab to swipe between raw grain and clean output, or open the “400% Zoom Loupe” to scrutinize fine edge boundaries, hair textures, and skin pores.
- Export Lossless PNG, Modern WebP, or ZIP: Choose your preferred target format and quality slider, then click “Download Denoised”. If working with multiple files, click “Download Batch as ZIP” to receive an in-memory packaged archive instantly.
6. Real-World Applications
- Low-Light Smartphone Photography: Eliminate the speckled chromatic noise that plagues night shots captured on compact mobile phone camera sensors.
- Portrait Retouching & Skin Smoothing: Achieve soft, flattering skin textures while retaining natural facial pore structures and razor-sharp eyelashes.
- Archival Film & Document Digitization: Eradicate scanner optical flare, sensor hot pixels, and dust flecks from digitized historical prints and film negatives.
- Astrophotography & Long Exposures: Tame hot pixels and electronic background sensor glow across dark sky frames without diminishing pinpoint star clusters.
- E-Commerce & Product Photography: Produce clean, studio-grade product catalog images with uniform neutral backgrounds free of compression noise and shadow mottling.
7. Frequently Asked Questions (FAQ)
Does this tool upload my private photos to a remote cloud server?
No, absolutely not. The Universal Image Noise Reducer operates 100% client-side inside your web browser using HTML5 Canvas pixel buffers and JavaScript memory streams. Zero bytes or personal photos are ever transmitted across the internet, guaranteeing complete privacy for personal night photos, family memories, and confidential document scans.
What is the difference between Color Noise and Luminance Noise?
Luminance noise affects brightness values, creating a monochromatic texture similar to traditional black-and-white film grain. Color noise (chrominance noise) introduces random colored blotches (red, green, purple speckles). While subtle luminance noise is often tolerable or artistic, color noise is universally undesirable and should be eliminated first.
Why does my photo look blurry when I turn up the denoise radius too high?
A very large filter radius forces each pixel to calculate weights across a wider geographic neighborhood. If the intensity range threshold (σr) is also set high, the filter will blend across gentle edges. For the best balance between silky smooth surfaces and razor-sharp lines, keep the radius between 2 px and 4 px and fine-tune your Edge Preservation slider.
Can I batch process dozens of noisy photos at once?
Yes. You can drag and drop multiple images into the queue simultaneously. Once your calibration sliders are dialed in, click “Denoise Entire Batch” to process all photos in sequence, then click “Download ZIP” to export the entire cleaned collection in one compressed package.
Universal Image Noise Reducer & Denoising Studio
Eliminate high-ISO sensor grain, remove chroma color speckles, preserve sharp object edges with bilateral filtering, and batch enhance photos in real time.
No Image Loaded Yet
Upload a grainy high-ISO photo, drag an image here, or click "Load Sample" to see real-time edge-preserving noise reduction in action.
🔬 Photographic Noise Science & Bilateral Mathematics Guide
Luminance Grain vs. Chrominance Color Speckles: What's the Difference?
Digital camera sensors capture photos via small photodiodes. In low-light conditions or with high-ISO settings, electronic signal amplification introduces two distinct forms of visual noise:
- Luminance Noise (Y channel): Monochromatic variation in brightness. It resembles traditional photographic film grain and is often visually acceptable or even aesthetically pleasing if subtle.
- Chrominance Noise (Cb & Cr channels): Unsightly colored blotches (random red, green, and purple speckles) that destroy natural skin tones, dark skies, and clean shadows.
Our dual-domain engine converts images into the YCbCr color space, enabling independent high-pass chrominance smoothing while retaining crisp luminance micro-contrast.
Why Edge-Preserving Bilateral Filtering Outperforms Standard Gaussian Blur
Standard spatial Gaussian blur operates strictly based on geometric pixel distance. This creates a uniform softening effect that blurs sharp edges, eyelashes, text, and architectural lines, resulting in an out-of-focus appearance.
In contrast, the Bilateral Filter computes weights using both spatial proximity and radiometric (intensity) difference:
If a neighboring pixel has a drastically different color or luminance (an edge boundary), its range weight collapses toward zero. Consequently, noisy flat areas (skies, walls, smooth skin) are blended, while high-contrast edges remain sharp and intact.
Restoring Micro-Contrast with Post-Filter Unsharp Masking
Even gentle denoising can cause subtle softening across very fine high-frequency textures (such as hair strands, knit fabric, or fine foliage). Our tool incorporates an integrated high-pass difference mask:
$$\text{Detail} = \text{Source} - \text{Denoised}$$
By blending an adjustable percentage of this high-frequency mask back into the clean bilateral output, users recover tactile texture and punchy micro-contrast without reintroducing high-frequency color noise.
100% Client-Side Privacy Guarantee & Offline Safety
All pixel manipulation, spatial matrix convolutions, format encoding (WebP/PNG/JPEG), and ZIP packaging happen entirely inside your web browser using HTML5 Canvas pixel buffers and native memory streams. Zero bytes, photos, or confidential scans are ever uploaded to an external server or cloud service. Your images never leave your computer.